Showing posts with label New Project. Show all posts

Monday, May 14, 2012

Mr Men and Little Miss Appliques

What I am working on is some hand made appliques of mr men and little miss to go on the back of a couch in the school library. At the moment the couch is a simple straight 2 seater in a dark blue that needs a bit of a colour up lift. I plan on making the black outlines in a black velvet type fabric and sewing it onto the colours of the characters and then adding vlysofix to the back and ironing it onto the couch. the yellow of this girl for instance will be cut out flush to the black outline once I have sewn the black onto it.

The outer edges and the red of the pig tails will not, to give it the simple look as if a child has coloured in a page. the size is of the characters are roughly 35cm tall by 41cms wide, so they are quite large. the plan is to make characters for the back of the couch and 1 on the outer sides of the arms. I also plan on making 2 cushions to sit on the couch. these will be square. Fingers crossed!
The fabrics for the characters is polar fleece.

Friday, October 21, 2011

Tapestry Bag

I have been absent from my blog for a while, Busy working with my sons' Halloween project. He does not want step by step blogged about so this is another project I have been working on. Making a bag. This bag style is a take on the tapestry/Gladstone bag using available materials. This wine rack from Savers I have taken apart for the parts and will be the closure for the bag and the handles.
This is the parts of the assembled wine rack, scissors glue and leather to make the closure.
The leather has been glued to hold it all together on the corners and the centre of the moveable hinges are made so that it opens up flat one way only.
Materials used are curtains that my niece gave me when they redecorated. I will be making teddy bears with this fabric too. The wrong side of the fabric is used for the right sides of the bag, I just love the colourway. I have used the lining of the fabric for the lining of the bag.
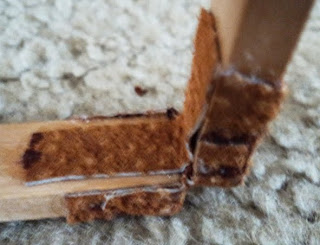
The centre hinges.
A simple bag on the way to being made. All the sides are the same height and it is lined with a hard plastic bottom insert between the layers. It is just pinned at the moment.

It will have leather straps cut from the boots I bought from Savers for my Halloween costume, and I will make handles from the wine rack too.

Wednesday, June 1, 2011

Wings Work in Progress

This is another idea I have been playing with, This is a shortened much smaller version of the final thing, which will be wings for a girl woodland fairy costume. In this much smaller version i have used florists wire. In the actual version i will be using recycled electrical wire in many different thicknesses. This is one wing.
The wires have been put into groups of 3 and the lengths have been staggered. I first taped each bundle separately then taped them all together.
Using whatever I have to make the ends curl, in this case, a lid of a glue pot, I then tape the circles around.
They are now beginning to look like seed pods. Using iron on interfacing One underneath and one on top,I enclosed a couple of beads to represent seeds. You can colour in the interfacing before hand if you wish to give it more pop.
I then have cut off the excess interfacing and you now have branches of honesty seeds which you can now bend the wires to whatever pleasing shape you like. I have only bent the bottom one for now. The ends of the wire has been curled and on the actual project they will have beads and the ends will be away from the girls back.

Tiara

This is what I am working on today. A tiara from recycled materials. My son has these sports powder drinks and i have saved it to use but until now I did not know what for. I have decided to make a tiara. First i peeled off the label and was surprised to see a lovely strip of paper to use underneath.
I folded the paper into sections and cut out shapes. I then taped the paper onto the container and used a marker to transfer the pattern.
I cut out the top section first so that i could hold it then cut out the shapes. This is done quite roughly, i will fine tune it after and smooth out the lines.
I then cut off the bottom part. Now I can spend my time smoothing it out. I will finish it by decorating it with hot glue beads and findings, flowering gum nuts etc.

Monday, May 30, 2011

Work In Progress

This is the exciting project I have been working on. Project is a big one! Props and things for the school play. Nothing has been finished yet, but all work in progress.
The premise of the play is about waste, and how to rethink how we use things. This skeleton of a dinosaur is made out of cardboard and stuck with tape and will be painted when it is finished. The stand it is on was an old lamp base. I have to keep in mind what i am making will be light enough for kids to move and be made with easily accessible materials.
This is the seat part of a forest fairy chair/stool.
A fairy wand. An apple tree branch covered with beads and jewels from my stash.

I have an idea for the fairy costume, that is going to be shown in the next few days as well as other costumes and props. I am very excited by it all. There will be animals and insects to name but a few, as well as a large dragons tail.

Tuesday, May 24, 2011

What I am Up To

A few of my readers may have noticed that my blog is a little boring at the moment. Apart from my charity knitting, crochet and sewing, have not shown much in the way of creativity. I have been busy but I cannot show what I am up to at the moment but it is fun and exciting.

Thursday, March 24, 2011

Dinosaurs

Giant Cardboard Dinosaurs. Currently it is on only 1 thickness of cardboard. I will be gluing two or 3 layers together and tracing it out again to make it more stable.
This is half of the plans for the little wooden dinosaur i bought from Savers the other day and i have enlarged it on the computer and will be making it even bigger down at office works later on today. The cardboard is free from my local supermarket.

Monday, February 21, 2011

Gargoyle

I am happy with the face but before I undo it all I mark the positions on the face front and mark all the pattern pieces including the nose gusset and chin gusset and inner mouth piece. Then I mark the upper head and lower chin gusset making sure i put positional marks on them first.

Sunday, February 20, 2011

Soft Sculpture

Tilli and Meggie helping as usual! This is the fabric i am using, along with the stuffing and the trusty cardboard that i like to use to help me create.
A rough draft of my new project, The cardboard pieces are to help me visualize and get the dimensions of my new project. This is going to be made all in one colour, a mid to dark grey woolen fabric.

Monday, February 14, 2011

Tiki Cushion

The Camera Works! This is the start of my next project. I am making a cylindrical Tiki Cushion. This is the cardboard pieces ready to choose the fabric and applique next.

Saturday, January 29, 2011

Pink Flamingoes

Started a new project today, Large Pink Flamingos in 3 dimensional cardboard. I will be making 3 of them, going from left to right, we have 2 main body pieces, 2 inner body pieces minus beak, 3 inner but i think i might do 5 body pieces without neck and face and 2 wing pieces. They will be taped together leaving spaces with cardboard and double sided tape to help give it the 3D look. The legs will be dowels. They will be just slightly smaller than life sized for Renees classroom as they will be learning about Hawaii. The class will be decorating them to finish them off. This is the body for one, i will be doing this 2 more times. It is great to get back into creating again! My son Mark is providing me with the cardboard from work instead of the boxed getting crushed.
Hardest part of it for me is the posting of pictures, my camera screen is broken so i have to just shoot and hope i get a good picture, at least it still works!

Sunday, December 26, 2010

Baby Dolls

This is what i am currently working on. Dolls, Puppedolls, and Teddy Bears by Estelle Ansley Worrell, published in 1977 by Van Nostrand Reinhold Company. This is an old book but one of my favourites.
This is the pattern i will be making, Little baby. 10 of them.

I have already knitted 10 vest and pants.

Thursday, December 9, 2010

Paper Decorations

I am making today some paper decorations using old Christmas cards and old cheap ones we have not used. These can either be put onto string and make a garland or a loop added to hang on a tree. What you need per decoration, 5 circles folded in half with picture side inside. craft glue. glue white side glue sides together and you end up with a ball.

Saturday, November 27, 2010

Finished

This is the giraffe finished, I am making a lap blanket using wool i bought at Spotlight for 50c a ball, 8 balls in total. and Meggie, Loves the knitting yarn so it has to be in a bag when i am not working on it.
Overhead view, I like the way the pattern turned out. Just need to use a brush to take the fur out of the seams.

Saturday, November 20, 2010

Honey Bears

Funky Friends Factory has a wonderful bear pattern that you can download free when you sign up for their newsletter, I think it is just delightful, I am going to make 5 of them, 3 in this light yellow fleecy and 2 in the dark brown, all will go under the K.Mart Wishing Tree this year.

Friday, November 12, 2010

Pin Dolls

I had been to Savers in Greensborough the other day and bought these lovely tapestry and embroidery yarns and was wondering what i was going to do with them, and i thought of Pin Doll Brooches. I cut out the pin doll pattern onto freezer paper and ironed them onto flesh coloured fabric.
I then sewed them all around leaving an opening for the arms and snipped on the back of the head and body to turn them right sides out. I use turning tubes to turn them right sides out. What this means is to insert a larger tube in the fabric with the smaller tube on the outside and push them to make it go right through.
Turned right sides out and stuffed. The are 10 cm tall.
Then i decided to use a variegated thread to crochet with and started to make a dress on the doll as i went. More pictures tomorrow with the recipe of how the dress was done. Light in the house is not good for photos right now.

Thursday, November 11, 2010

Finished

The cakes are finished and have started a mock up of my next project.
Cushions and back for some chairs for my son and his girlfriend. Not the fabric that will be used eventually and not padded. Using cardboard i traced the shaped of the chair seat and back and sewed then cut them out. I added ribbon to the fabric for ties.

The final chair covers will be padded, the frame will be spray painted to match the final cushion covers.

Friday, November 5, 2010

Cup Cake Stand

While i am waiting for my ebay purchases to arrive to put into the Christmas bags, I came up with this. A cup cake stand. It will be covered with felt and bias binding.
One of the lovely things we are doing this Christmas is having a Pin Cushion Swap at our cloth Doll Club A.C.D.A. and i am making cup cakes. I thought it would be nice to put it on a stand.
I used 2 plates of different sizes, then made the stem making sure that the lower plate opening is larger than the top one so that it sits nicely.
These are a mix of cakes. Sewn ones with silicone cups and knitted ones.

The pattern for the knitted cup cakes can be found in this magazine. Knitting and Crochet N0 1 Designed by Linda Purdy.

Thursday, September 30, 2010

Knitting


My niece is expecting their first baby due in early January next year and as an Auntie i am very excited! This is what i have been working on in the last week or so. A knitted sleep suit and a jumper. My niece lives in the next suburb away and yesterday i taught her how to knit. Very exciting indeed!

Saturday, August 7, 2010

Wheat Bags


This is the start of the process of the wheat bags i am making. I have the main body with the upper part lining piece, Where the opening in the bottom is will have velcro closures, the top will have a fabric stopper just for effect. On each of the bags i will have individual applique of their own Likes/hobbies. Now i am going to hunt out some fabrics, eg, Denim for my brother. The outer fabric because it will not be in the microwave does not have to be a natural fabric, but the wheat bag insert does.